Is your garbage disposal making strange noises, leaking, or simply not working anymore? Don't rush to call a plumber just yet! Replacing a garbage disposal is a surprisingly straightforward DIY project that can save you hundreds of dollars. This comprehensive guide will walk you through each step of the process, from safely removing the old unit to installing and testing the new one.
Why Replace a Garbage Disposal?
Garbage disposals typically last 10-15 years before requiring replacement. Over time, their components wear down, leading to decreased performance, leaks, and eventually complete failure. How do you know when it's time to replace your garbage disposal? Look for these common warning signs:
- Frequent clogs: Dull blades make it difficult to grind food waste effectively
- Persistent leaks: Especially from the bottom of the unit, indicating internal damage or rust
- Unusual noises: Loud grinding or humming sounds suggest a failing motor or damaged parts
- Power issues: Frequent resetting or complete lack of power often signals problems beyond simple fixes
- Age: If your unit is approaching or beyond the 10-year mark, replacement is often more cost-effective than repairs
Safety First: Essential Preparations
Before you even think about touching your garbage disposal, safety must be your top priority:
- Turn off the power: Locate the circuit breaker that controls the garbage disposal (often shared with the dishwasher) and switch it to the "Off" position. Always test the wires with a non-contact voltage tester to ensure the power is completely off.
- Turn off the water supply: Shut off the cold water supply valve under the sink to prevent accidental flooding during the replacement process.
- Gather all tools and materials: Having everything on hand before you start will save time and frustration.
Tools and Materials Checklist
To successfully replace your garbage disposal, you'll need:
Tools:
- Safety glasses and gloves
- Bucket and rags
- Pliers
- Screwdrivers (flathead and Phillips)
- Putty knife or scraper
- Adjustable wrench
- Wire strippers/cutters
- Non-contact voltage tester
- Hammer
- Hex wrench or disposal wrench (often included with the new unit)
Materials:
- New garbage disposal (measure the old one to ensure the new one fits)
- Plumber's putty
- Electrical tape
- Teflon tape (optional, for pipe connections)
- Pipe joint compound (optional)
- Dishwasher connector kit (if applicable)
Step-by-Step Guide to Replacing Your Garbage Disposal
1. Disconnect the Plumbing
Before removing the old unit, you'll need to disconnect all plumbing connections:
- Place a bucket under the sink to catch any water that may spill out.
- Disconnect the drainpipe (discharge tube) from the disposal. Use pliers to loosen the slip nuts if necessary.
- If your disposal is connected to a dishwasher, disconnect the dishwasher drain hose as well.
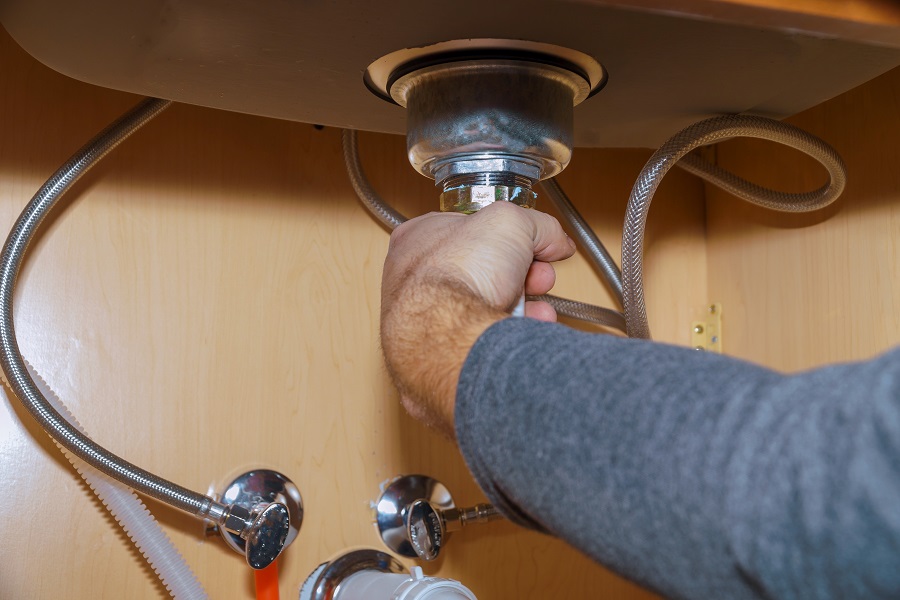
2. Remove the Old Disposal
Now it's time to remove the old unit:
- Support the disposal with one hand (they can be heavy, so be prepared).
- Insert a disposal wrench or screwdriver into one of the mounting lugs on the lower mounting ring.
- Turn the mounting ring counterclockwise to loosen the disposal from the sink flange. This may require significant effort, so apply steady pressure.
- Once loose, carefully lower the disposal and place it on a protected surface.
3. Disconnect the Electrical Wiring
With the disposal removed from the mounting assembly, you can now disconnect the electrical connections:
- Remove the cover plate on the bottom of the disposal.
- Loosen the screws on the electrical clamp connector.
- Use wire strippers/cutters to disconnect the wires, paying close attention to the positions of the colored wires (black, white, green/ground).
- Remove wire connectors and set them aside for use with the new unit.
4. Remove the Old Mounting Hardware (if necessary)
If your new disposal's mounting assembly isn't compatible with the old one, you'll need to remove the existing hardware:
- Loosen the mounting screws on the mounting assembly.
- Pry off the snap ring using a screwdriver.
- Remove the old mounting assembly and sink flange.
- Use a putty knife to scrape away any old plumber's putty from around the sink opening until the surface is clean and smooth.
5. Install the New Sink Flange and Mounting Assembly
Now you'll prepare the sink for the new disposal:
- Roll a rope of plumber's putty (about 1/2 inch thick) and place it around the drain opening in the sink.
- Press the new sink flange into the drain opening. You can use the old disposal as a weight to hold it in place (protect the sink with a towel).
- From underneath the sink, slide the fiber gasket, backup flange, and mounting flange over the sink flange.
- Slip the snap ring into the groove on the bottom of the sink flange until it clicks into place.
- Tighten the screws on the mounting ring, alternating between them to apply even pressure. Continue tightening until the sink flange is snug against the sink.
- Wipe away any excess plumber's putty that squeezes out from under the flange.
6. Connect the Electrical Wiring
With the mounting assembly in place, you can now connect the electrical wiring to the new disposal:
- Remove the cover plate on the bottom of the new disposal.
- Thread the electrical cable through the strain relief fitting.
- Connect the wires, matching the colors (black to black, white to white, and green/ground to the green screw). Secure with wire nuts.
- Tighten the strain relief clamp to secure the cable.
- Reattach the cover plate.
7. Mount the New Disposal
Now it's time to attach the new disposal to the mounting assembly:
- Align the mounting tabs on the disposal with the slots in the mounting ring.
- Turn the lower mounting ring until the tabs lock into place.
- Use a wrench or screwdriver to tighten the mounting ring, securing the disposal firmly in place.
8. Connect the Plumbing
With the disposal securely mounted, reconnect the plumbing:
- Attach the discharge tube to the disposal outlet. You may need to use a new gasket if one is provided with your new unit.
- Connect the discharge tube to the drainpipe. You may need to adjust the length of the tube using a hacksaw to ensure proper fit.
- Reconnect the dishwasher drain hose, if applicable. Secure with a hose clamp for a watertight seal.
9. Test for Leaks and Function
Before considering the job complete, test your new installation:
- Turn the water supply back on.
- Turn on the circuit breaker to restore power to the disposal.
- Run cold water and let it flow for a few minutes while checking all connections for leaks.
- Tighten any loose connections if you notice drips or moisture.
- Turn on the disposal and make sure it's running smoothly without unusual noises or vibrations.
Troubleshooting Common Problems
Even with careful installation, you might encounter some issues. Here's how to address them:
Leaks
- Sink flange leaks: Ensure the flange is properly seated with sufficient plumber's putty and that the mounting assembly is tight.
- Connection leaks: Check that all connections are tight and properly sealed. Use Teflon tape or pipe joint compound on threaded connections.
- Disposal housing leaks: If the disposal itself is leaking from the body, it may be defective and require replacement.
Electrical Issues
- Disposal won't turn on: Check the circuit breaker, reset button on the disposal, and ensure the unit is properly plugged in or wired.
- Disposal hums but doesn't run: The unit may be jammed. Turn off the power, then use the hex wrench on the bottom of the unit to manually rotate the blades and dislodge any obstruction. Never put your hand inside the disposal.
Noise Problems
- Grinding or rattling: Check for any loose objects inside the grinding chamber like small utensils or hard food debris.
- Persistent noise: If the noise continues after cleaning, the motor bearings may be failing, indicating a need for replacement.
When to Call a Professional Plumber
While replacing a garbage disposal is a manageable DIY project for many homeowners, there are situations where calling a professional is the wiser choice:
- If you're uncomfortable working with plumbing or electrical wiring
- If you encounter significant leaks or plumbing issues that you can't resolve
- If you need to modify existing plumbing or electrical connections (e.g., adding an outlet)
- If your kitchen sink has a non-standard configuration
- If you suspect the problem might be more complex than a simple disposal replacement
Choosing the Right Garbage Disposal
If you're shopping for a new garbage disposal, consider these important factors:
Horsepower
- 1/3 HP: Suitable for small households with minimal food waste
- 1/2 HP: Good for most average-sized households
- 3/4 HP: Ideal for larger families and frequent cooking
- 1 HP and above: Best for heavy use and grinding tougher food waste
Feed Type
- Continuous feed: The most common type, activates when you flip a switch and continues running until turned off. Convenient but requires careful operation.
- Batch feed: Only operates when the cover is in place, making it safer, especially in households with children.
Important Features to Consider
- Stainless steel grinding components: Offer better durability compared to galvanized steel
- Sound insulation: Worth the investment for quieter operation
- Auto-reverse function: Helps prevent jams by automatically reversing the direction of the grinder
- Anti-jam technology: Detects tough items and increases torque to prevent stalling
- Warranty length: Look for models with longer warranties (typically 1-10 years)
Maintaining Your New Garbage Disposal
To maximize the lifespan of your newly installed garbage disposal:
- Always use cold water: Run cold water while operating the disposal and for 15-20 seconds after turning it off.
- Avoid problematic foods: Never put grease, bones, coffee grounds, pasta, rice, or fibrous foods (like celery or corn husks) down the disposal.
- Clean regularly: Grind ice cubes or citrus peels to clean and freshen the disposal.
- Use proper cleaning methods: Pour a small amount of dish soap into the disposal while running cold water occasionally.
- Avoid harsh chemicals: Never use drain cleaners in your disposal as they can damage the unit's components.
Conclusion
Replacing a garbage disposal is a rewarding DIY project that can save you significant money compared to hiring a professional. By following the steps outlined in this guide and taking necessary safety precautions, you can confidently tackle this task and enjoy a properly functioning disposal for years to come.
Remember that proper maintenance is key to extending the life of your new disposal. With regular care and appropriate use, your newly installed garbage disposal should provide reliable service for the next decade or more.
Whether you're replacing an aging unit or upgrading to a more powerful model, this step-by-step guide provides everything you need to know about how to replace a garbage disposal successfully. Happy DIYing!